
Blog
Company Updates and Latest News
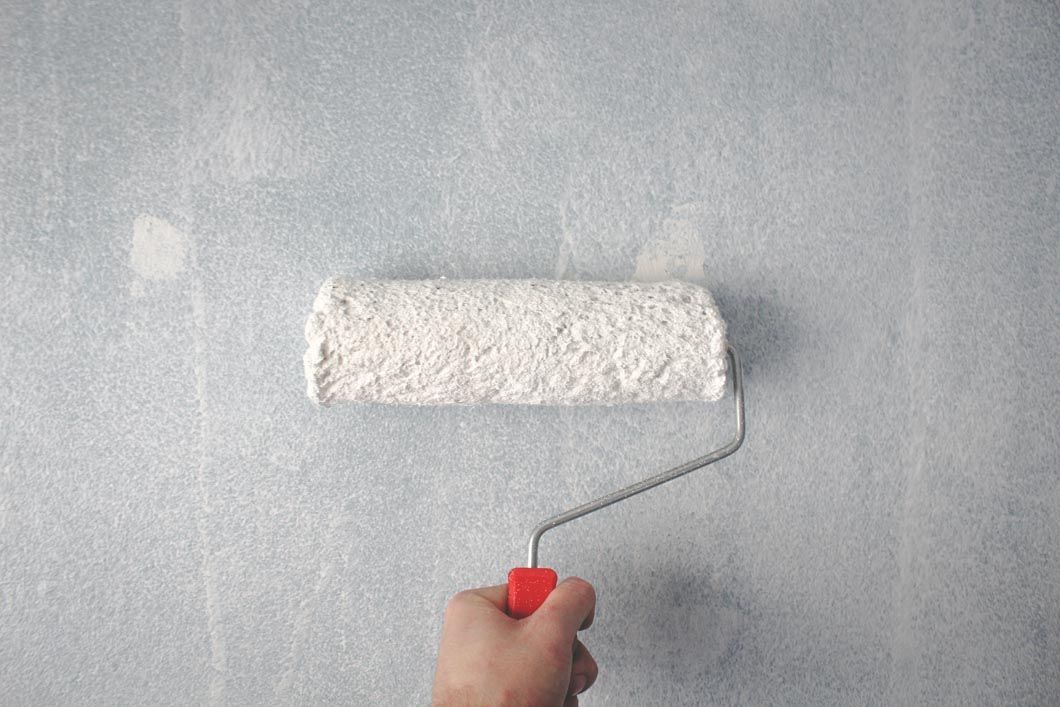
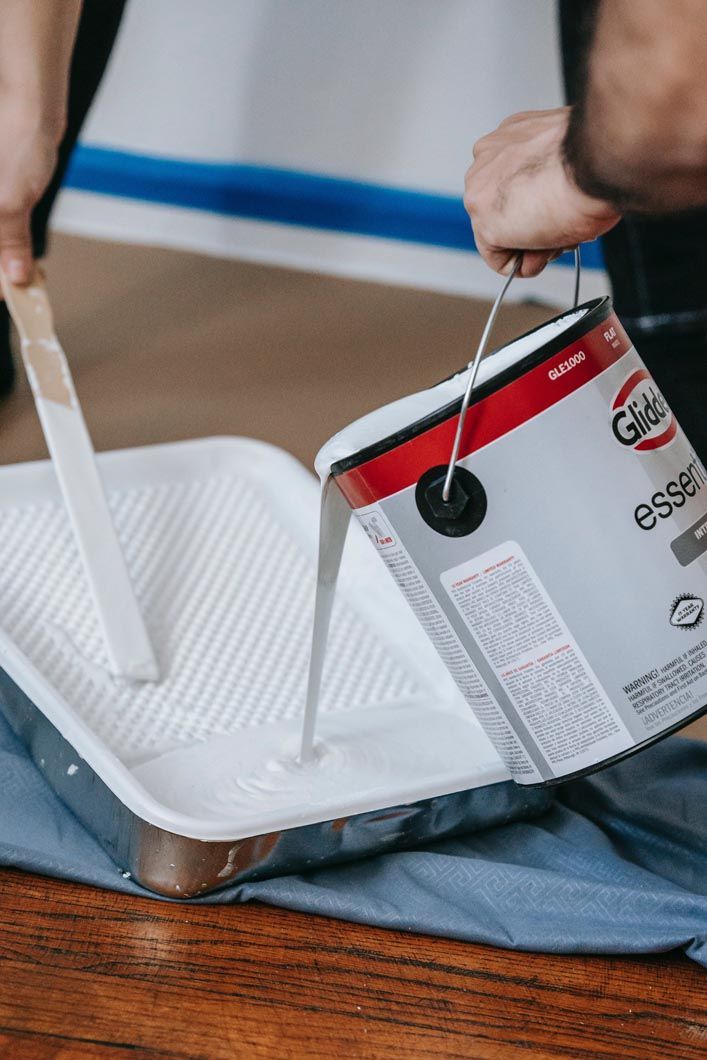
Starting an interior painting project can be a thrilling experience. Whether you do it yourself or hire a pro, the first few rolls of paint on the wall are exciting to see. It is often necessary to spend a significant amount of time preparing before beginning to paint. You must select the paint type, color, and sheen. After that, you must clean the area and the surface. Following that, you or your contractor will prepare the surface further if necessary by patching damaged areas and taping the area to be painted. While it is exciting to see the transformation that comes with interior painting, no one enjoys watching paint dry. That being said, knowing how long paint takes to dry is critical, or you risk ruining your freshly painted walls. So, how long does interior paint take to dry? Type of paint The type of paint you use can influence drying time. When looking for paint, you may come across some that advertise quick drying times on the can. Latex paint dries faster than oil-based paint in general. Oil Based Paint vs Latex Paint. Reading the label of the paint you’re considering can often provide an estimate of drying time. However, because the environment can influence drying time, it is critical that you do not use this as your sole guide for determining how long it will take to dry. Remember that what you need the paint to do is more important than how quickly it dries. For example, if you require the extra durability of oil-based paint, use it even if it takes a little longer to dry. In the end, you’ll be glad you had the extra patience. Current weather The weather in your area at the time you decide to paint can affect drying time. Even inside, cold and damp weather can make it difficult for paint to dry completely within the usual dry time. If the weather is mild and dry, you can open windows to help the drying process and to keep smells out from your house (especially if you are using an oil based paint). If the weather is damp and cold, you may need to wait longer in between coats. Make every effort not to let impatience affect the quality of your paint job. If the weather isn’t ideal for painting, think about waiting so the paint doesn’t dry too quickly. If the best paint option is one that takes longer to dry, use it because it will serve you best in the long run. How long must I wait before applying the second coat? After two to four hours, most interior paints are ready for a second coat, but just because your walls are ready for a re-coat doesn’t mean that they are cured. Most walls will not be ready for use for about twenty four hours, and so try not to touch the walls within a day of painting. Be patient with paint application. If you apply the second coat too quickly, it may end up bubbling, dripping, or running. It isn’t worth it. Here are a few pointers to help you make the most of your interior painting day: If the humidity is high, you can use a dehumidifier or an air conditioner to reduce it. However, don’t lower the humidity too low because interior paint cures best with moderate humidity. A fan can also help to promote air circulation and speed up the cooling process. Just be careful not to spread hair or dust on your freshly painted walls. Keep track of the time it takes you to complete each wall. Instead of waiting four hours from the time you finished the last wall, you can begin re-coating each wall as soon as it is ready. A Few Words: You have a little more control over interior paint jobs if you want to speed up the drying process. Increased airflow can help speed up the drying time of water-based paints. So, if you want to speed up the drying process, open the windows and use a light fan to increase ventilation. Or else you should hire a professional Interior Painter in Charleston, and definitely give us a chance to serve you. We have a team of professional painters who are reliable, expert, & believe in straightforward communication. Contact Blue Nile Today at (843) 310-1074 .
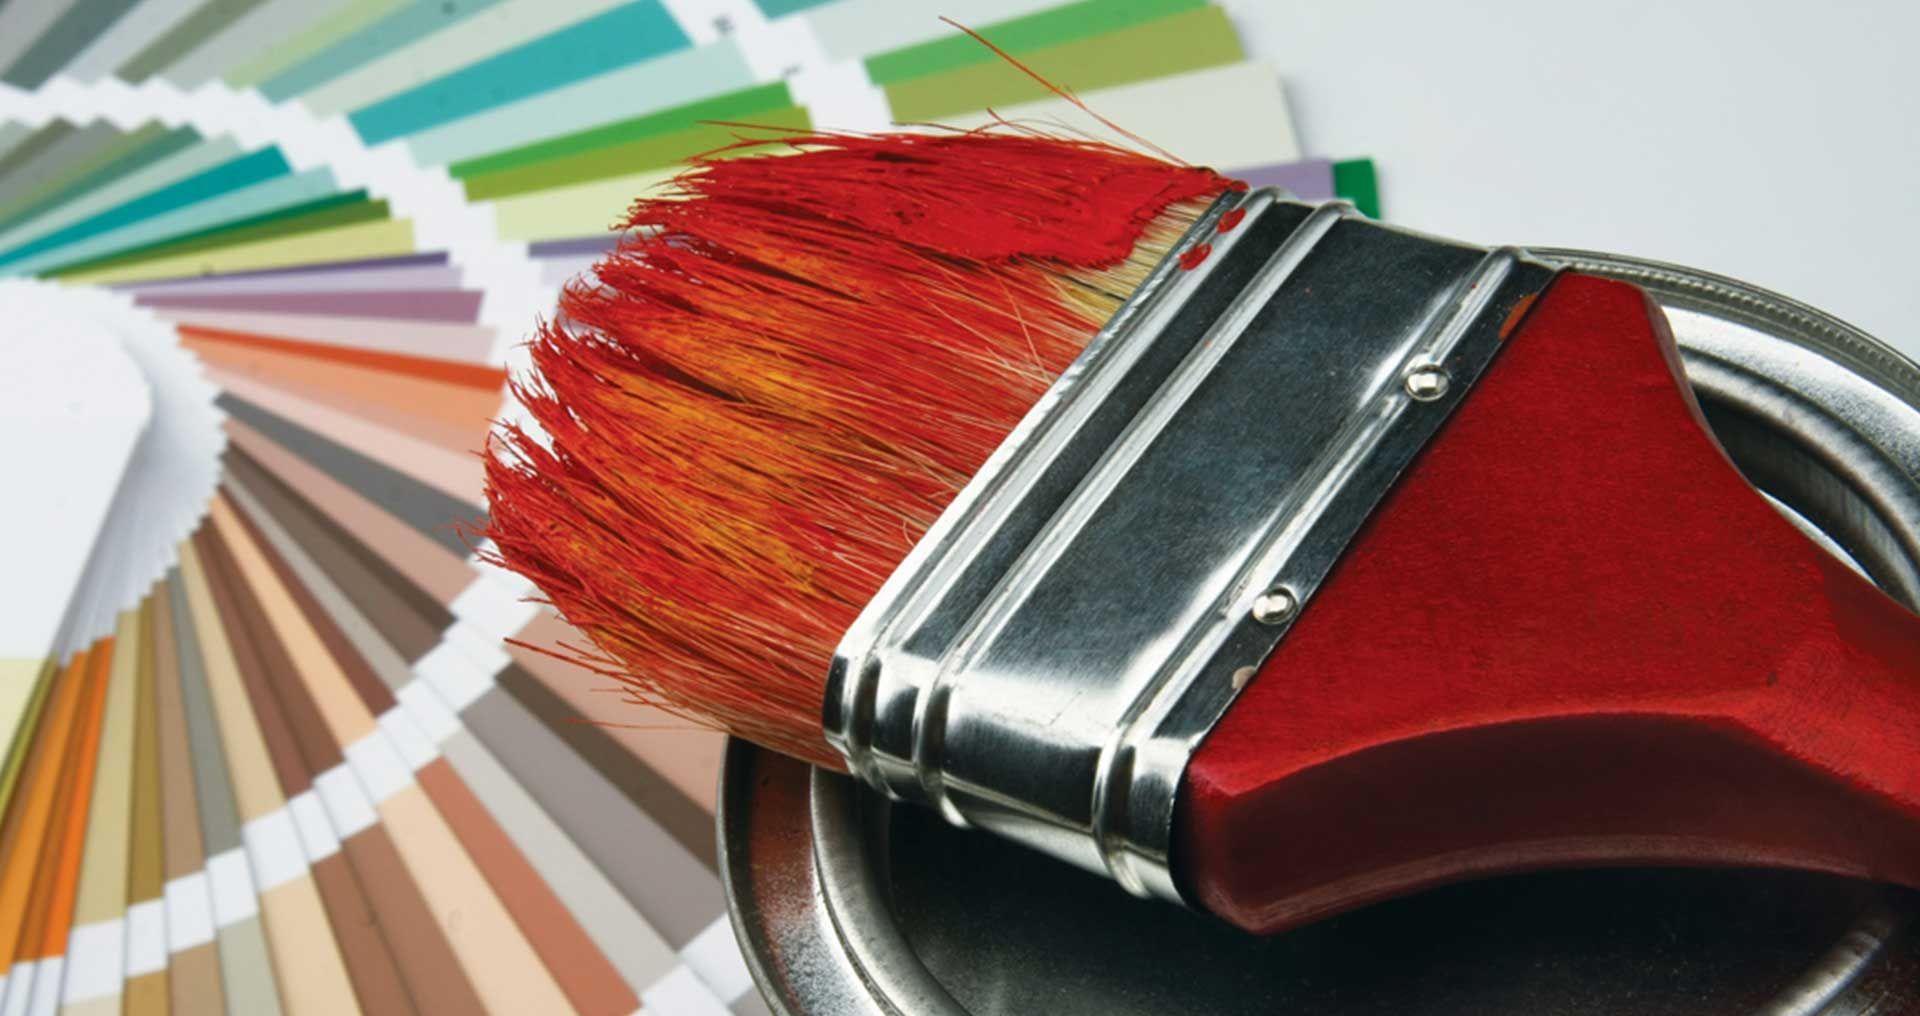
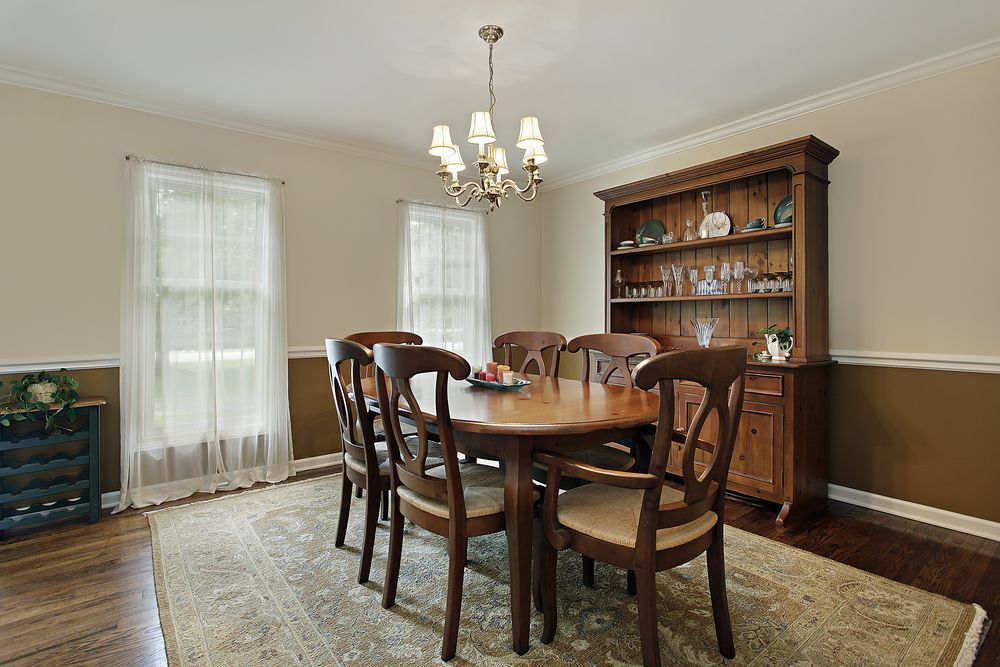
When it comes to painting a room in your home, choosing the right paint colors can be a daunting task. There are so many options to consider and it can be difficult to know where to start. However, with a little bit of planning and consideration, you can find the perfect paint colors to suit your style and create the look you want for your home. In this guide, we will provide tips and strategies for selecting the right paint colors for your space, including determining your style, considering the lighting and purpose of the room, and using tools like a color wheel to help you make your decision. By following these steps, you can confidently choose the perfect paint colors for your home. Determine your style Before you start choosing paint colors, it’s important to consider the overall style of your home. Do you prefer a modern, minimalistic look or a more traditional, classic style? Your paint choices should reflect the style of your home and complement its overall design. Look at design magazines and websites, or create a mood board with images of spaces that inspire you to help you determine your style. Check out this color visualizer to get started. Consider the lighting The lighting in a room can significantly affect the way a paint color looks. Natural light, artificial light, and even the time of day can all impact the appearance of a paint color. It’s a good idea to view paint swatches in the room you plan to paint at different times of day to see how the light affects the color. If the room has little natural light, opt for lighter shades to help brighten the space. If the room gets a lot of natural light, darker shades may work well to balance out the brightness. You will get a much better look at the color if you get a large color swatch sticker. You can pick these up from your local Sherwin Williams store. Simply choose a few colors you like, take off the plastic, and stick the swatch to your wall (easy and harmless removal). Plus, Sherwin Williams offers great online tools such as: ColorSnap Visualizer (Mobile) ColorSnap Visualizer (Desktop) Think about the purpose of the room The intended use of a room should also be taken into consideration when choosing paint colors. For example, a bedroom should have a relaxing, soothing color, while a kitchen might be better suited to a brighter, more energizing shade. Consider the mood and atmosphere you want to create in each room and choose paint colors that support that. Consider the size of the room Lighter, cooler colors can make a small room feel larger, while darker, warmer colors can make a large room feel more cozy and intimate. If you’re not sure which direction to go, consider the direction the room faces. Rooms that face north tend to be cooler and benefit from warmer hues, while rooms that face south tend to be warmer and benefit from cooler hues. A kitchen, for example, can be made to feel larger and cleaner if you were to paint it with a light hue. It will make the space feel lively and might even inspire you to try out new recipes! Dark colored kitchens tend to feel closed in, while light colored kitchens tend to feel more open. Take note of existing finishes The finishes in a room, such as flooring, cabinetry, and countertops, can all influence the paint color you choose. Consider the colors and finishes already present in the room and select a paint color that complements them. You don’t want to choose a paint color that clashes with the other finishes in the room, so it’s important to consider how everything will work together. A good piece of advice is to choose a base color that you want to build your palette of off. If you already have the name of the paint color then you can go to your local Sherwin Williams, pick up the color card for that color, flip the card over, and see a list of complimentary colors. If you don’t have the exact color, pick up a few color cards that closely resembles it and match them back at home. One you have found the closest color, you will know which colors will compliment it by simply flipping the card over. Use a color wheel A color wheel can be a helpful tool when selecting paint colors. It can help you understand the relationships between different colors and choose shades that work well together. Complementary colors, which are opposite each other on the color wheel, tend to work well together, as do colors that are next to each other. If you are unfamiliar with the color wheel, check out this helpful article on How to Use a Color Wheel . Test the paint Before committing to a paint color, it’s a good idea to purchase a small sample of the paint and test it on the wall. This will allow you to see how the color looks in the room and determine if it’s the right choice for your space. It’s also a good idea to test the paint in different areas of the room, as the color may look different depending on the lighting and surrounding finishes. Sherwin Williams has a great selection of paints and offers cost effective paint samples with their Color to Go Paint Samples . Don't be afraid to mix and match It’s okay to mix and match paint colors within a room. For example, you might choose one color for the walls and another for the trim or use a different color on each wall to create visual interest. Just be sure to choose colors that work well together and create a cohesive look. Experiment with different combinations and see what works best for your space. Consulting a color wheel would be a great place to start when doing this. Consider the future While you may love a particular paint color now, consider how it might look in a few years. Neutral colors are often a safe choice because they are timeless and can be easily updated with accessories. Trust your instincts Ultimately, the right paint color for your home is one that makes you happy and feels like it belongs in your space. Trust your instincts and go with a color that speaks to you. By considering these factors, you can choose the perfect paint colors for your home and create a cohesive and stylish look throughout.
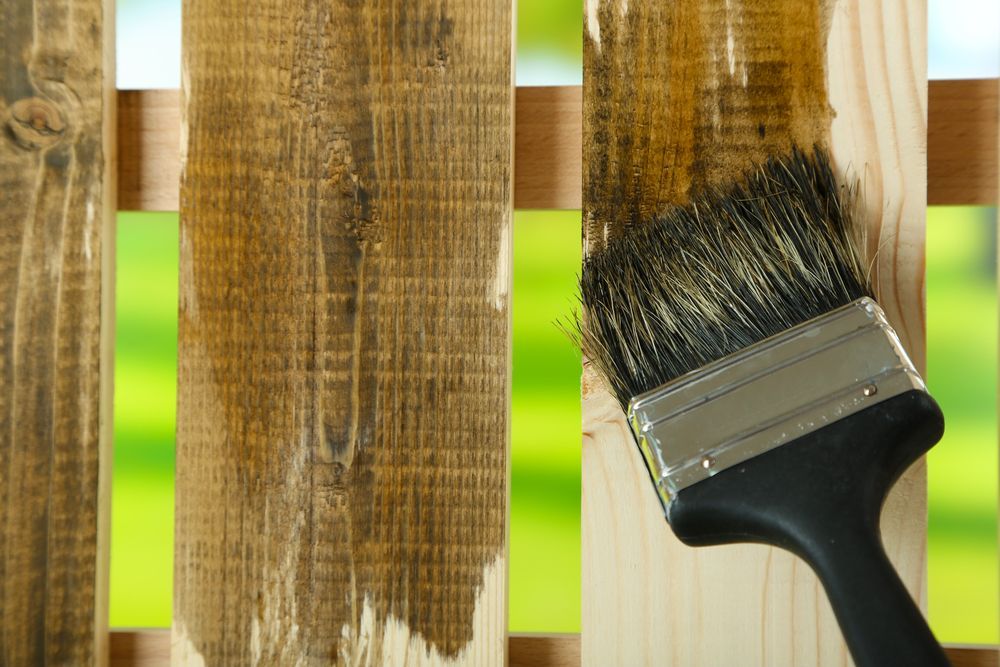
Fence staining is an important process for maintaining the appearance and longevity of your wooden fence. Staining helps protect the wood from weathering, rot, and pests, and it also gives the fence a polished, finished look. In this blog, we’ll cover the steps involved in staining a fence and provide some tips for getting the best results. Preparing the surface Before you start staining your fence, it’s important to prepare the surface. First, you’ll need to clean the fence thoroughly. You can use a pressure washer or a mixture of water and mild detergent to remove dirt, dust, and any debris that has accumulated on the wood. To give the fence an extra deep clean and remove any stains or discoloration, you may want to consider using bleach or a wooden fence cleaner when pressure washing. Be sure to follow the instructions on the product and wear protective gear, as these chemicals can be harsh. After cleaning, be sure to let the fence dry completely before moving on to the next step. Making repairs Next, you’ll need to repair any damaged or rotten areas of the fence. This may involve sanding, filling, and/or replacing boards as necessary. Once the repairs are complete, if needed, sand the entire fence to remove any rough or splintered areas. Make sure to dust off any excess residue left after sanding. This will help ensure that the stain is applied evenly and smoothly. Choose a stain Now it’s time to choose your stain. There are many different types of wood stains available, including oil-based and water-based options. Oil-based stains tend to penetrate deeper into the wood, providing longer-lasting protection, but they also take longer to dry and have a strong odour. Water-based stains are easier to work with and have less odour, but they may not provide as much protection as oil-based stains. You’ll also need to choose a colour for your stain. You can match the colour of your existing fence or choose a different hue to give your fence a new look. Applying the stain Before applying the stain, be sure to read the manufacturer’s instructions and follow all safety precautions. You’ll also need to decide whether you want to use a brush, roller, or sprayer to apply the stain. Each method has its own pros and cons, so consider your personal preference and the size of your fence when making this decision. Once you have your equipment and materials ready, you can start staining your fence. Begin at the top of the fence and work your way down, applying the stain in long, even strokes. Be sure to overlap your strokes to ensure that the entire surface is covered. You may need to apply multiple coats of stain to achieve the desired level of coverage and protection. Finishing up After you’ve applied the final coat of stain, allow it to dry completely according to the manufacturer’s instructions. This may take several hours or even a full day, depending on the type of stain you’re using and the weather conditions. Once the stain is dry, your fence is ready to enjoy! Additional Tips Here are a few additional tips to keep in mind when staining your fence: Always wear protective gear, including gloves and a mask, when working with wood stain. If you’re using an oil-based stain, be sure to dispose of any rags or brushes safely
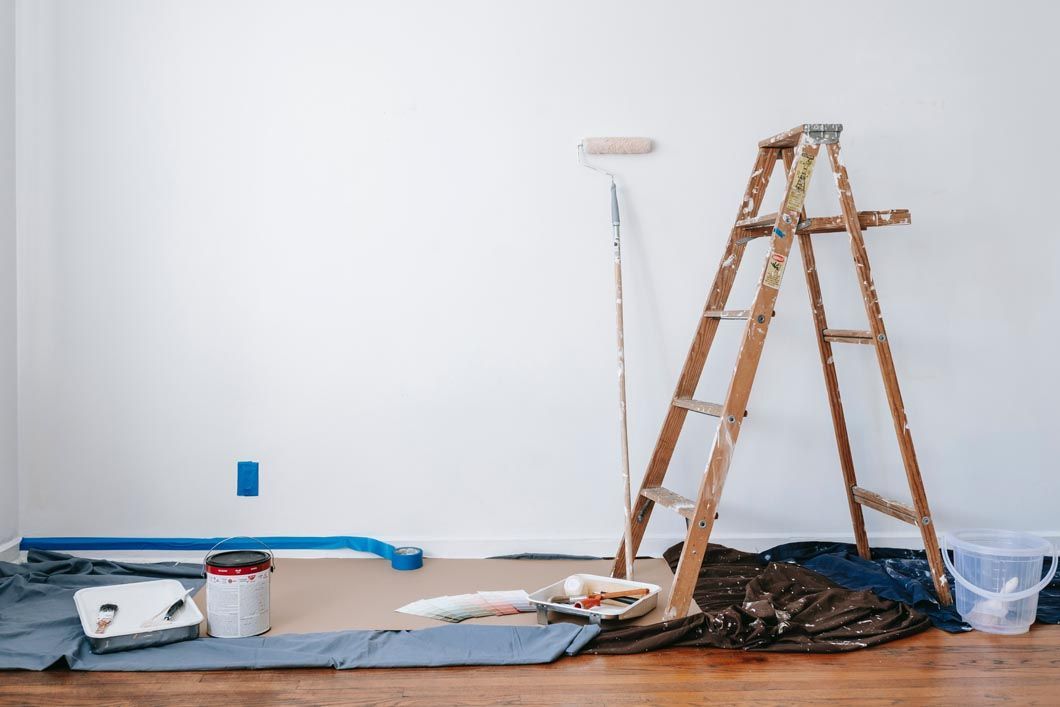
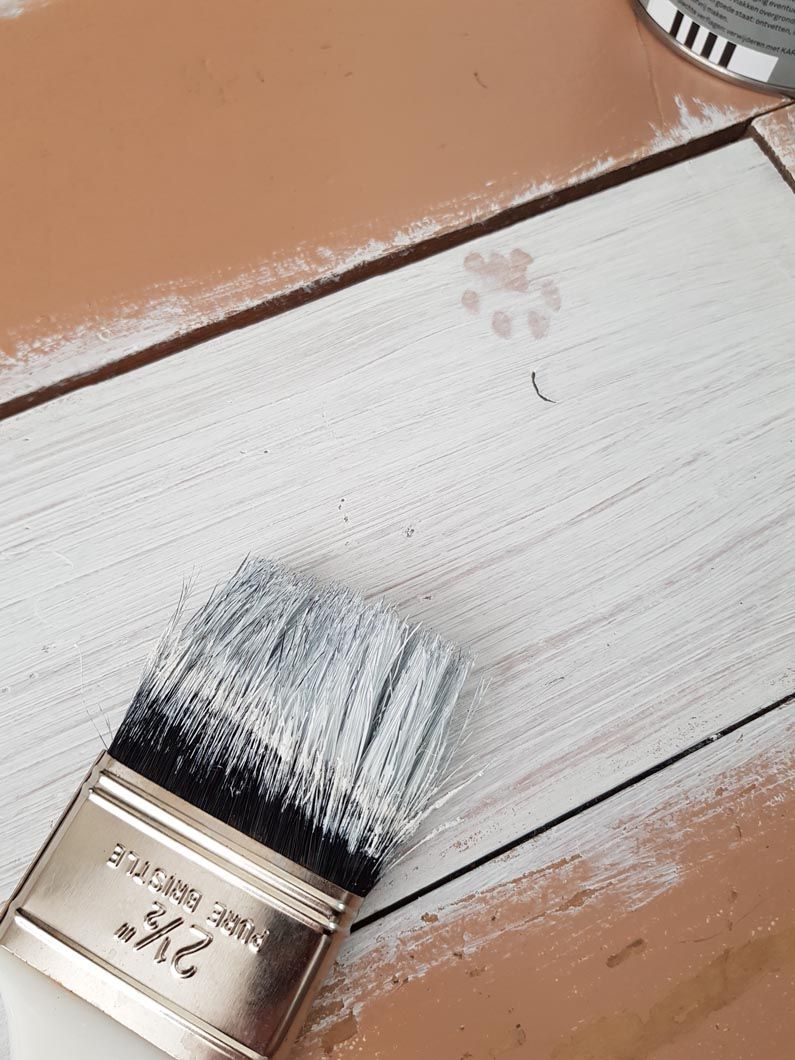
Painting a room in your home can be a fun and rewarding project. It‘s also an easy way to freshen up the look of your space without having to invest in new furniture or decorations. Whether you‘re painting one room or several, here are some tips to help ensure that the job goes smoothly and looks beautiful when it‘s done: Choose the right paint When selecting paint for your Charleston home, consider both color and finish. For an elegant look, opt for a satin or eggshell finish, while semi–gloss paints are better suited for areas that may need frequent cleaning (such as bathrooms and kitchens). Also take into account any climate considerations; for example, humidity can cause certain types of paint to peel over time so make sure you choose a product that‘s designed specifically for Charleston‘s environment! Prep the space Before you get started with painting, make sure that all furniture is removed from the room, as well as any rugs or curtains that could get in your way during the process. Also take time to fill any holes or cracks with joint compound and sand them down so they’re smooth before applying primer and paint. Cover surfaces Once all prep work is complete, cover surfaces like windowsills, floors and baseboards with painter’s tape or drop cloths to protect them from accidental splatters of paint during application process. Make sure to press down firmly on the edges of the tapes so that they won‘t lift up when you start painting. If there are any crevices or corners that are hard to reach, use an old brush or a cotton swab dipped in paint thinner to get into those areas and prevent any possible spills. Additionally, consider laying down some plastic sheets over the flooring before beginning your project in order to protect it from potential splatter marks. This is particularly important if you have carpets or rugs in the room; it will help ensure that they don‘t become stained by paint as you‘re working! Start with primer Primer helps seal porous surfaces so that they don‘t absorb too much of your paint color; this will give you better coverage throughout each coat of paint applied later on top of it.. Always use a quality primer before starting on any painting project – even if it‘s just a single wall – so that it lasts longer over time! Apply multiple coats When applying multiple coats of either primer or paint (or both!), make sure each layer has completely dried before adding another one on top; otherwise, they‘ll mix together and create an uneven finish which isn‘t desirable at all! A good rule of thumb is two thin layers rather than one thick layer; this will ensure even coverage throughout every area being painted.. Clean up when finished Once all coats have been applied (and allowed to dry properly), remove painter’s tape carefully so there aren‘t any unwanted lines left behind on walls/trim pieces etc., then wipe down everything with a damp cloth afterwards for cleanliness sake! This should help protect against dust/dirt build–up over time too!
Are you planning to refinish some patio furniture with leftover paint from the living room or basement, or to repaint an exterior wall or door? Is it possible to use interior paint outside? Although the short answer is yes, it’s not recommended. Interior paint is not meant to withstand rain, snow, wind, or exposure to ultraviolet, mold, or high temperatures. It contains fewer pigments and binding resins than outdoor paints and has a porous finish. As a consequence, the paint will fade quicker, dust or chalk, crack, and flake. This article will look at interior paint, and why it is best used indoors. We’ll also go over what you should do if you happen to use it outside anyways. What Exactly Is Interior Paint? Interior paints are designed specifically to use indoors. They are made to stick to various surfaces, reflect or absorb light, and withstand the abrasion and wear of daily contact and cleaning. They also do not normally have to withstand the expansion and contraction of the freeze-thaw cycle, as well as exposure to harsher natural elements. Can Interior Paint Be Used Outside? Why it is not Recommended? There are numerous reasons why you might want to use interior paint outside. Some of the reasons I’ve heard are that it’s less expensive, you want to use up leftover paint, or you like the color. However, while interior paint can be used outside, it should not be. Interior paints are made differently than exterior paints. They are not designed to withstand freeze-thaw, rain, snow, mold, and mildew and will chalk, fade, and break down faster. Interior paints are more porous, lack the resin needed to bond to exterior surfaces, and are more prone to cracking and flaking. If you insist on using interior paint outside, seal it with one or two coats of exterior-grade clear-coat sealer. It may extend the length of time it will adhere depending on the amount of exposure to the elements, but it will not necessarily prevent it from fading, and the sealer may turn yellowish. Using interior paint with a sealer increases the amount of work and reduces the finish of more costly exterior paints. Furthermore, using interior paint outside voids its warranty. Because the surface is protected from the elements, painting the inside surface of a front door with interior-grade paint is acceptable. The surface must be properly prepared, particularly if it is a metal door. If the door is protected by a storm or glass door, you can use the same paint on the outside; otherwise, it will fade, crack, and chip. Filling cracks, using TSP to clean the surface, a sealer, a masonry primer, and several coats of paint are all necessary before using interior paint on interior concrete walls or slabs. Using interior paint on exterior concrete, on the other hand, necessitates an additional coat or two of quality exterior sealer over the interior paint. Interior paints will still fade and wear faster than exterior paints due to exposure to the sun and other elements. Some people are unsure whether interior paint can be used as an exterior primer. You can use it as a primer for a variety of reasons, including cost reduction. It will need to be lightly sanded to improve adhesion before being covered with quality exterior paint of the same base. Unfortunately, depending on the adhesive qualities and the extremes of your climate, you may still need to repaint the surface in a year or two. Modern interior grade paints are formulated for interior use, not outside. 3 Reasons Why It's a Bad Idea to Use Interior Paint Outside Not able to Withstand Natural Environmental Elements It is not long-lasting Cannot withstand harsh temperatures Conclusion: I hope this article has helped you understand why using interior paint outside is not such a great idea. Anyways, it’s best to let a professional paint your house, as this work requires years of practice and expertise. If you are looking for a professional interior/exterior painting service in Charleston SC. We at Blue Nile Home should be your first choice. Our team of experts knows the ins and outs of the work and are: Professionally trained, respectful, punctual, and respect deadlines. Contact Blue Nile Today at (843) 310-1074 .
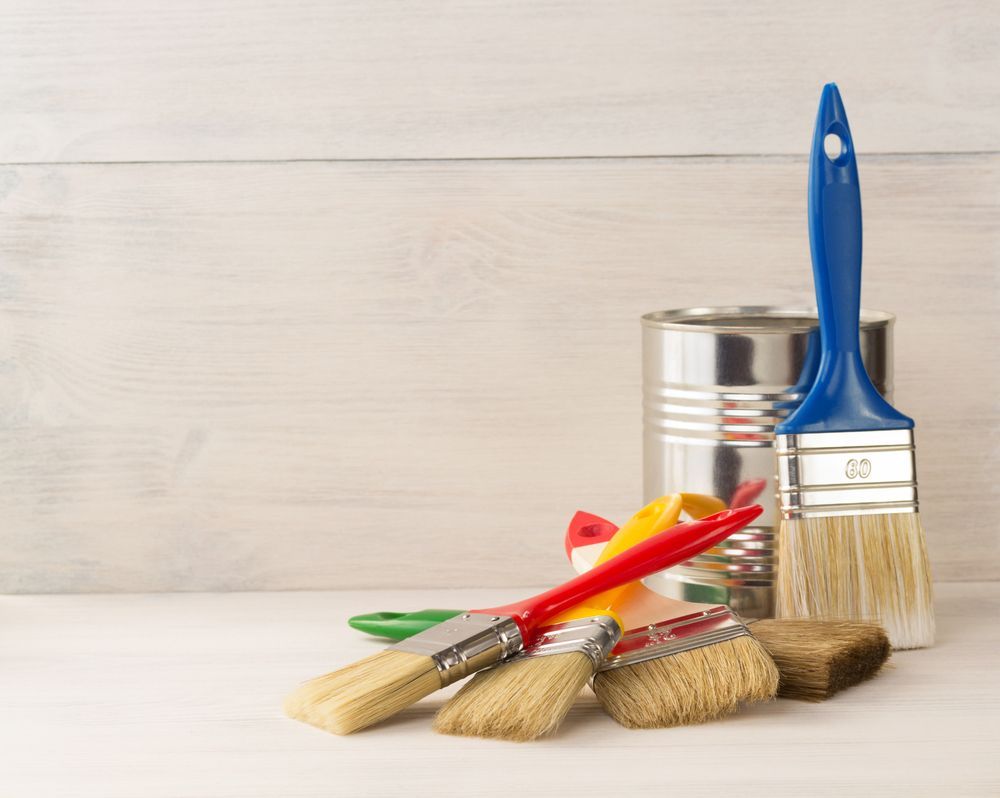
Do you have an old piece of furniture that has been sitting around for some time and has started collecting dust? You may ask, why should I refinish it when I can buy a new piece instead? It is true that refinishing wood furniture and antiques takes time, but it can save you a lot of money and it gives you the opportunity to learn a fun and exciting craft . This guide will show you how you can restore your old furniture and give it new life. What You Will Need To Get Started Before you get started, you’ll want to invest some money in getting the right hand tools and equipment . Not only will having this equipment make the process easier for you, but it will make the end product look even better. Equipment: Paint Brushes Latex Gloves Hand Sandpaper Orbital Sander & Varying Grit Sandpaper Clean Rags Putty Knife Water Bucket Screwdrivers (If needed) Materials: Stain Wood Filler (If needed) Wood Finish Mineral Spirits Liquid Paint Stripper Deep Cleaning The Deck Once you’ve sourced your tools and materials and have everything on the job site & ready to go, it’s time to scrub and dub. But before you start applying any chemicals on anything, consider this pro tip: sprinkle water around the periphery of the deck on your grass and plants. When you spray or lay on your chemicals, some of the substance with invariably splatter on your yard and declare war on your grass. The water will help dilute the chemicals and shield your beautiful yard from damage. Now your first step is to spray off the deck only using water. Make sure to get all of the surfaces wet. Next, you’re going to use a general deck cleaner & protectant to clean up the grime. If you’re using your pressure washer to spray this on, you can mix in the cleaner with a syphon tube in a 10:1 ratio (use a low pressure nozzle for this). Here is a helpful video for doing this: How to Stain a Deck the Easy Way . If you are not using a pressure washer, you can use a handheld sprayer for this. Spraying And Scrubbing Off The Deck Cleaner As the adage goes, “good things take time”. This couldn’t be any more true with woodwork. Let the chemicals sit on the deck for at least 10 minutes before you wash it off. This will allow the chemicals to penetrate the dirt, grime, mold, and grease that has built up on the deck, therefore loosening it from the surface enough to allow it to be sprayed or scrubbed right off in the next step. Well, that brings us to the next step then. How convenient! It’s time to put that elbow grease to work. Use your deck scrubber and pole to work out the nasties that have been loosened up by the degreaser. Use a hand scrubber (or simply detach the deck scrubber from the pole) to scrub the spindles and rails. Once you’ve done this, switch to a high pressure nozzle on the pressure washer and spray all of the chemicals off. Remember, keep the tip of the sprayer at least 8 inches away from the surfaces. If you like your deck and don’t want to chip away the wood, make sure to do this. Using A Deck Brightener Great job, you’ve completed the first couple steps in your deck refinishing journey. Now, this next step is optional, but if you want a great end product then it is highly recommended. This step is actually very similar to the last, but instead of using a general degreaser, you will use a brightener like this one from #1 Deck . Simply apply the brightener like you would the general cleaning solution across every surface of the deck. Make sure that you spray the deck with water first and get all of the surfaces wet. When applying to vertical surfaces, apply it from bottom to top. Also, good news! You get a break from using that elbow grease on this one. It’s not necessary to scrub away this solution. Instead, let it sit for 10-15 minutes so that it can penetrate the wood and then wash it away with the high pressure nozzle or water hose. You’re off to a great start! Now it’s time for the next step. Sanding Down The Uneven Surfaces Beyond just taking care of splinters, sanding your deck down will produce a much more consistent stain pattern – given you apply the stain correctly. The deck should be dry to the touch before you start sanding, or you’ll create a thousand problems you don’t want to have. You’ll want to spend the majority of your time sanding the handrails and the places you will touch with your hands or rest your arms. It is not necessary to sand the surface deck boards as thoroughly as you sand the handrails, but you do want to sand it enough to get rid of rough patches. Use a great orbital sander like this Dewalt 5 inch orbital sander for this process, or if you want to go overboard and make your life 10 times easier, try out this Rigid 6 inch orbital sander . For the spindles, use 80 grit or 150 grit hand sandpaper. Once everything is sanded down and looking clean, you’re ready to stain! Staining The Wood There are many methods to applying stain to wood, and this process that I’m about to lay out will save you a lot of trouble if you follow it. Don’t get discouraged when you lay down the first coat of stain and it doesn’t look like a million bucks, this is normal, the second coat is where the magic happens. Check out this blog on the best stain options of 2022 . We really, really like Thompson’s Stain & Seal , these product are amazing. Consider using this RenuVo Stain Applicator that I mentioned earlier to stain the surface deck boards, it’ll save you a lot of trouble, trust me. Everybody has different methods on the order of staining, but I’ll go ahead and tell you that you should start with the spindles, working your way from the bottom to the top, and then stain the handrails. You can use a brush and a stain pad for this, or you can use one of these bad boys: Wagner Handheld Sprayer . Also, get the edge of the deck boards in between the spindles during this process so that when you start staining the surface boards you won’t have to get into the crevices. Work your way from the far corner to the stairs, moving backwards and staining 2 to 3 boards per run. Once you reach the stairs, hand stain the vertical areas and then use the applicator to stain the flat parts. Now that you’ve got one coat on, let it dry to the touch and repeat! Time To Admire Your Work Great job, you’ve just learned how to stain a deck from start to finish. If you love hard work and have a steady supply of patience, then this DIY job is for you! Deck staining can be a very enjoyable process if you have all the tools and knowledge that you need to get the job done. Figuring it out along the way will cause a migraine or 10. But, if you follow this guide, you’re sure to have a massive head start. If you’ve read this and you’d rather have a pro do the work for you, just call Carpenter at (843) 310-1074 ! Thanks for reading this DIY guide on how to stain a wood deck. See you next time.
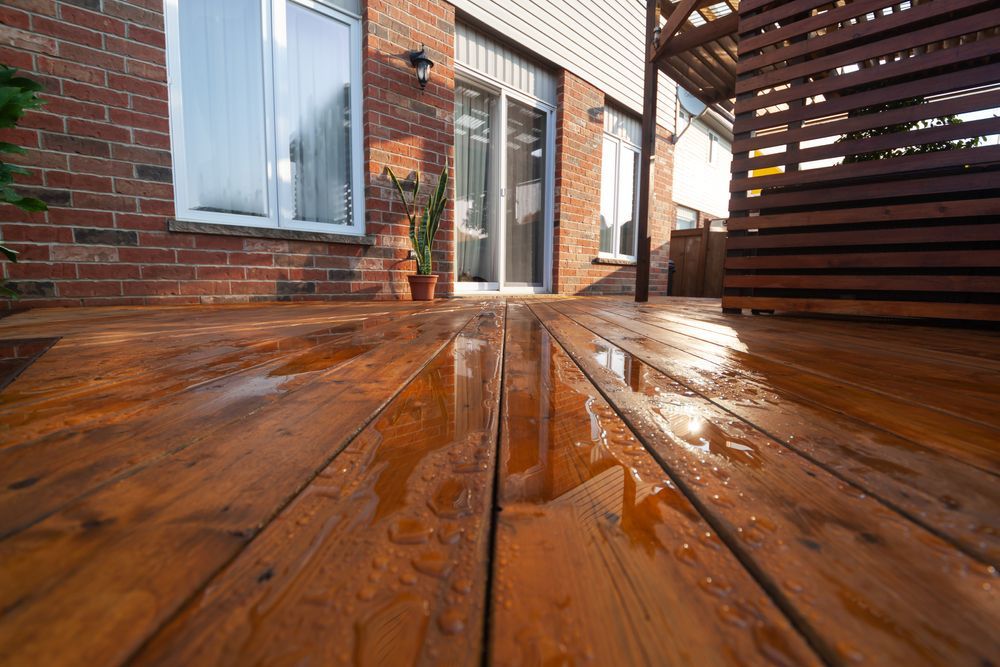
So you wan’t to rejuvenate that old deck of yours? Trust me, we understand that having a dull, chipping & dilapidated deck is no fun thing – especially if it attacks you with painful splinters. We can’t stand splinters and fading stain, and that’s why we take extra steps to bring our client’s decks back to life! For this blog though, I will be showing you how you can take on the challenge yourself if your feeling up to it. Let’s get started on this DIY blog of how to stain a wood deck. Gather Your Materials There are several tools that you may want to consider renting, buying, or borrowing for this process. Otherwise, the work will undoubtedly break your back and you’ll be sore for days. All joking aside, consider taking a look at these helpful tools listed below: A Pressure Washer Stain Pad Applicator or RenuVo Stain Applicator Deck Brush & Hand Deck Scrubbing Brush A Stain Brush A Paint Tray A Good Orbital Sander or The Mack Daddy Orbital Sander 80 Grit Sandpaper & 150 Grit Sandpaper Deep Cleaning The Deck Once you’ve sourced your tools and materials and have everything on the job site & ready to go, it’s time to scrub and dub. But before you start applying any chemicals on anything, consider this pro tip: sprinkle water around the periphery of the deck on your grass and plants. When you spray or lay on your chemicals, some of the substance with invariably splatter on your yard and declare war on your grass. The water will help dilute the chemicals and shield your beautiful yard from damage. Now your first step is to spray off the deck only using water. Make sure to get all of the surfaces wet. Next, you’re going to use a general deck cleaner & protectant to clean up the grime. If you’re using your pressure washer to spray this on, you can mix in the cleaner with a syphon tube in a 10:1 ratio (use a low pressure nozzle for this). Here is a helpful video for doing this: How to Stain a Deck the Easy Way . If you are not using a pressure washer, you can use a handheld sprayer for this. Spraying And Scrubbing Off The Deck Cleaner As the adage goes, “good things take time”. This couldn’t be any more true with woodwork. Let the chemicals sit on the deck for at least 10 minutes before you wash it off. This will allow the chemicals to penetrate the dirt, grime, mold, and grease that has built up on the deck, therefore loosening it from the surface enough to allow it to be sprayed or scrubbed right off in the next step. Well, that brings us to the next step then. How convenient! It’s time to put that elbow grease to work. Use your deck scrubber and pole to work out the nasties that have been loosened up by the degreaser. Use a hand scrubber (or simply detach the deck scrubber from the pole) to scrub the spindles and rails. Once you’ve done this, switch to a high pressure nozzle on the pressure washer and spray all of the chemicals off. Remember, keep the tip of the sprayer at least 8 inches away from the surfaces. If you like your deck and don’t want to chip away the wood, make sure to do this. Using A Deck Brightener Great job, you’ve completed the first couple steps in your deck refinishing journey. Now, this next step is optional, but if you want a great end product then it is highly recommended. This step is actually very similar to the last, but instead of using a general degreaser, you will use a brightener like this one from #1 Deck . Simply apply the brightener like you would the general cleaning solution across every surface of the deck. Make sure that you spray the deck with water first and get all of the surfaces wet. When applying to vertical surfaces, apply it from bottom to top. Also, good news! You get a break from using that elbow grease on this one. It’s not necessary to scrub away this solution. Instead, let it sit for 10-15 minutes so that it can penetrate the wood and then wash it away with the high pressure nozzle or water hose. You’re off to a great start! Now it’s time for the next step. Sanding Down The Uneven Surfaces Beyond just taking care of splinters, sanding your deck down will produce a much more consistent stain pattern – given you apply the stain correctly. The deck should be dry to the touch before you start sanding, or you’ll create a thousand problems you don’t want to have. You’ll want to spend the majority of your time sanding the handrails and the places you will touch with your hands or rest your arms. It is not necessary to sand the surface deck boards as thoroughly as you sand the handrails, but you do want to sand it enough to get rid of rough patches. Use a great orbital sander like this Dewalt 5 inch orbital sander for this process, or if you want to go overboard and make your life 10 times easier, try out this Rigid 6 inch orbital sander . For the spindles, use 80 grit or 150 grit hand sandpaper. Once everything is sanded down and looking clean, you’re ready to stain! Staining The Wood There are many methods to applying stain to wood, and this process that I’m about to lay out will save you a lot of trouble if you follow it. Don’t get discouraged when you lay down the first coat of stain and it doesn’t look like a million bucks, this is normal, the second coat is where the magic happens. Check out this blog on the best stain options of 2022 . We really, really like Thompson’s Stain & Seal , these product are amazing. Consider using this RenuVo Stain Applicator that I mentioned earlier to stain the surface deck boards, it’ll save you a lot of trouble, trust me. Everybody has different methods on the order of staining, but I’ll go ahead and tell you that you should start with the spindles, working your way from the bottom to the top, and then stain the handrails. You can use a brush and a stain pad for this, or you can use one of these bad boys: Wagner Handheld Sprayer . Also, get the edge of the deck boards in between the spindles during this process so that when you start staining the surface boards you won’t have to get into the crevices. Work your way from the far corner to the stairs, moving backwards and staining 2 to 3 boards per run. Once you reach the stairs, hand stain the vertical areas and then use the applicator to stain the flat parts. Now that you’ve got one coat on, let it dry to the touch and repeat! Time To Admire Your Work Great job, you’ve just learned how to stain a deck from start to finish. If you love hard work and have a steady supply of patience, then this DIY job is for you! Deck staining can be a very enjoyable process if you have all the tools and knowledge that you need to get the job done. Figuring it out along the way will cause a migraine or 10. But, if you follow this guide, you’re sure to have a massive head start. If you’ve read this and you’d rather have a pro do the work for you, just call Carpenter at (843) 310-1074 ! Thanks for reading this DIY guide on how to stain a wood deck. See you next time.
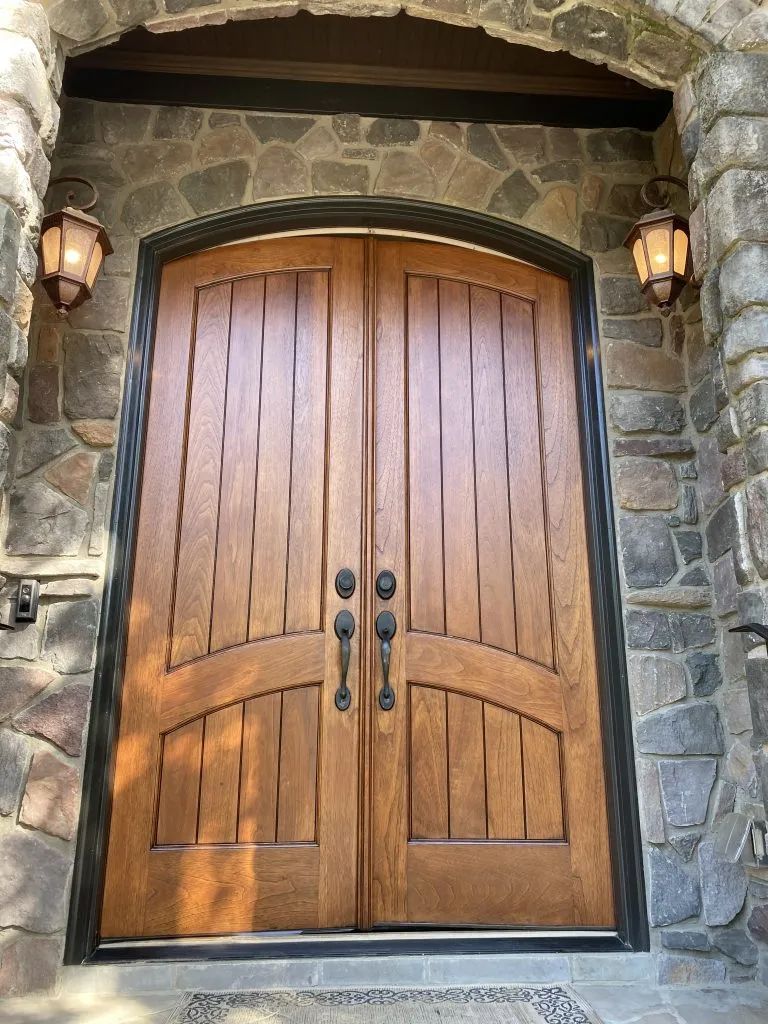
Refinishing your front door & entranceway may not be as straightforward as you may think. It sounds relatively easy. All you have to do is sand, stain, and seal it right? While that essentially covers the process it is the minutia, those small missed details, that will come back to haunt you later in the process. It turns out that in order to properly refinish a wooden door, you need to take it in four important steps that protect your property and produce a great end product. Let’s get started with the four steps on how to refinish a wooden door. Ready The Sander Typically, before you sand the door down to bare wood, you want to mask the window panes with tape so that the sandpaper does not scrape against the glass. This keeps your windows protected because, as you know, they are not cheap to replace. When sanding down a wooden surface, you should check to see how much you really need to sand down. If you are doing a full color change, especially if you are going from dark to light, you will need to sand down to bare wood. On the other hand, if you are staying in the same color tone, then you will only need to cut through the last clear coat and smooth out the surface to reapply a fresh coat of stain. For the fine details (meaning the trim, the grooves, and the molding) we like to use scrapers like this Bahco 665 or this Allway Contour Scraping Set to cut through the clear coat and then smooth it out with 150 grit sandpaper. When finished, the door should be consistently sanded down across the entire surface. Any sections that gleam in the light still have clear coat on them and you will need to work those out before you apply stain. Once you have the door sanded down evenly, it’s time to mask. Oh, I almost forgot, here is a super helpful video on how to use an orbital sander . It’s Masking Time. The materials you will need to properly mask go as follows: Frog tape , blue Scotch Tape , a roll of corrugated cardboard , masking paper , a hand-masker , and a roll of plastic sheeting . Use the roll of cardboard to mask the surface of your patio and inside your home to keep stain droplets from causing you a massive headache. Make sure you tape the cardboard securely to the ground with the blue scotch tape. Next, run either the frog tape or the scotch tape (depending on the surface) around the perimeter of the door. The frog tape is used for delicate surfaces, like your indoor walls, so that the paint will not strip when you remove the masking. Make sure the knobs and locks are fully covered with scotch tape. Use strips of masking paper to shield the window panes. Finally, if you are spraying clear coat with an applicator, you will need to prop the door open with door stops and drape plastic from the inside of the house in order to keep the fumes outside. Once you have it fully masked, it’s time for the next step! Ready, Set, Stain This step in the process can either be very enjoyable or big pain in the rear end. It comes down the what you use to apply the stain, how you apply the stain , and whether or not you keep your patience. Staining is a delicate job that requires experience to do correctly, so take your time. We use Terry Cloth stain pads to apply our stain. Wet the stain pad on both sides and make sure to squeeze out the excess back into the stain can. Keep several clean rags available to smooth out runs and spots where you over applied the stain. Apply the stain in the direction of the grain pattern and keep a consistent pace across the entire door. Most doors look great with one coat, but some need two. Remember, the more stain you apply, the darker it gets, so be sure to know this before you go crazy with applying more stain to uneven areas. Now that you’ve stained the door, it’s time for the finishing touches. Three, Two, One, Clear! Clear coating (or “finishing”) is an essential part of the process. It brings out the color of the stain, making it look rich and vibrant. Finish can be applied by hand (with a brush this time) or it can be sprayed on. Spraying the clear coat on will always be our preferred method, but we understand that not everybody has access to a compressor and a good spray gun . There are many exterior wood finishes out there that can do the trick, like Helmsman Spar Urethane but since we like to use the best products available, we use a water-based Melesi 2k Polyurethane that makes a wood surface look like a brand new Ferrari. Here at Blue Nile, we have a proprietary finishing method that we cannot disclose here, but it can be mentioned that more than one coat of finish is recommended. If you are brushing the finish on, there is a high likelihood that the coating will look white and soapy when applied. That’s totally fine. Brush it on like you would any regular paint, without smoothing it out to the point where you thin the coat, and let it dry completely before applying a new coat. And That’ll Do The Trick! I’ve hope you’ve enjoyed this little four step guide on how to refinish you wooden door & entranceway. Refinishing wood is a seemingly straightforward process that, as mentioned earlier, has many subtleties to it. This is not meant to discourage you from refinishing your door yourself of course. Anything can be done! If you follow this roadmap you will already have a good head start and enough knowledge to at-least take a go at it. But as a woodworker of over a decade, I will always suggest reaching out to a pro to do the job for you. Give Ethan a call today at (843) 310-1074 for all your door refinishing needs!
It is important to choose a team that will not only get the job done properly, but will ensure that no harm is done elsewhere on your property. Stains and cleaning supplies contain harmful chemicals that can seep into the soil and cause disturbances in your lawn, and so it is important to screen a contractor for their safety measures before you hire them to take on your home project. Here is some helpful advice for staining your wooden fence. Protecting your yard. An experienced contractor will take extra precautions to protect the surrounding area before any stain or chemicals are sprayed on ( this is assuming the pro is not hand staining ). One method to ask about is how the harmful cleaning chemicals are kept from killing your grass. Whenever a fence is prepped, it is sprayed down beforehand with cleaning applicants that can cause harm if not diluted. A good method to counteract this is by wetting the yard in the vicinity of the fence before the cleaner is applied so that if any chemicals are splashed on the grass then they are diluted by the water. Preparing the fence properly. Any exterior wooden surface is directly exposed to the elements and because this is the case it will invariably be effected by moisture damage, UV rays, insect damage, wood rot, and more. If an exterior wooden surface is not prepped correctly before stain and seal is applied, then the end product will be inefficient and splotchy. There are typically three stages to cleaning a fence. First is to apply a general degreaser/wood fence cleaner to the entire surface, let it dry, and then pressure wash it off. Second is optional but is preferred, and that is to use brightener to bring out the natural tone of the wood and then pressure wash that off as well. Lastly is to apply two coats of stain and to let dry and seal. Talk to a pro. Staining a fence can be a headache if the proper methodology is not in place. With a seasoned professional team, like us at Blue Nile Home Services, you can be assured that the job is done correctly from start to finish. We take great pride in all of our work and strive to achieve the best product. Give Ethan a call at (843) 310-1074 today for a free estimate!
When choosing a paint color for your interior home painting project, there are a few factors that you may want to take into account before making your decision. The coloring of a bedroom, bathroom, or kitchen are very powerful ways to evoke emotion and because your home is an extension of you, choosing these colors and creating a color palette is essential to defining the home of your dreams. More than this, the colors that you choose to paint your walls with should reflect your personalities and preferences and can even change the perception of the furnishings within your room. Here are 4 ways on how to pick paint colors for your interior rooms Determining Your Mood We can safely say that you bedroom is where you wind down and relax, and so choosing a color that will help instill relaxation will make your room feel more natural. Darker hues tend to shrink the perceived size of a room which can make it feel cozier. A great place to start in deciding your color palette is by taking a walk throughout your home with a notepad and writing down exactly what emotions you want to have whenever you enter a room, and then conveying that to your painter or designer during your color consultation. Deciding On Your Color Palette The general rule of thumb when deciding on a color palette is to go neutral. Neutral colors, which can be broken down into cooler and warmer hues, have a longer useful lifetime. What I mean by this is that it will allow you to completely redesign your home and put new furnishings in without making drastic changes to the interior coloring. Neutral colors tend to mix and match very well with many types of furnishing styles, where as non-neutral colors can conflict with design changes in the future. Using three shades of natural coloring that go well together will bring about a sense of consistency and flow inside your home. How Do I Choose My Color Palette? A great tip for choosing a color palette is by taking a walk through your home and finding three prominent, different colored pieces of furniture you have and snapping a closeup picture of them. Then, take these three pictures to your Lowes, Home Depot, or Sherwin Williams and find three color strip that most closely match those tones. With the paint strips chosen, you will have 18 different hues that would contrast great with your furniture. It's Up To You! There are so many different techniques, tips, and tricks for choosing your paint color when in the end – it is up to you! It is your home and you should make it feel the way you want it to. If you want to go bright red on all of your walls, and you are sure that color is right for you, then do it. Again, your home is an extension of your personality and so whatever color you choose will be the right decision. Blue Nile Home Services is here to serve you in giving color recommendations and bringing your home project to life. We are excited to work with you!